ITEM LISTS
Only the admin is allowed to use and set up this module.
This section aims to create an item list for residents to use for different cases. To create an ITEM LIST, you must first log in the application as an Admin user, access the settings section and follow the steps below:
Add Item List
- Press on the Item list from the left menu.
- Press on Add from inside the page.
- Fill the name, select the type and press on the Save button.
Add/Import/Edit Item List Items
- Click on the Item lists from the left menu.
- Click on List from inside the page.
- Fill the name, select the type and press on the Save button.
- Click the Residents button and select the residents that will use this list.
- Add items manually or by importing an excel .xls file:
- Manual – By typing the name and then pressing the plus icon.
- The items can have a hex color (#CC0000) changed or deleted by pressing the eraser icon.
- Import – By downloading a sample file from pressing the Download form button.
- Fill the excel file with values in the ItemValue (Product Name) and itemColor (#CC0000)
- Save the file
- Import the file by pressing the Import data
- Select the import mode: Replace items or Add items
- Press the import file button and select the file
- Click the update button
View/Search Item List
- Click on the Item lists from the left menu.
- Click on List from inside the page.
- View all the item lists or search specific lists by typing in the column name of the table
Edit Item List
- Click on the Item lists from the left menu.
- Click on List from inside the page.
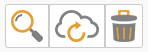
- Click the Cloud icon.
- Modify the wanted fields and then press the update button.
Operators can see and interact with the Cargo type once the item list is set for the selected Resident in Visited field for Auto record when adding or check-in.


1. To edit the admin branding, you have to be first on your admin account.
2. From the top right corner of the page you will be able to see and use the Help Section, Notifications and Settings.
3. From Settings you can change the Branding by setting up the image/logo and entering a custom text.
4. After setting up the brand, press on the Update button in order for the changes to take effect.
1. To sort the self-service records, you have to be first on your admin account.
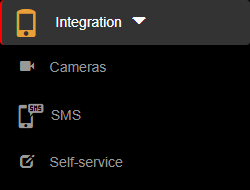
2. Press on the Integration tab ( ) from the left side of the page.
3. Then press on the Self-service tab ( ) from below.
4. Then press on the List button on the right side of the menu in order to see all self-service records.
5. Then press on the upper/lower arrow on the right of any of the name columns in order to sort the list.
1. To search a self-service record, you have to be first on your admin account.
2. Press on the Integration tab ( ) from the left side of the page.
3. Then press on the Self-service tab ( ) from below.
4. Then press on the List button on the right side of the menu in order to see all self-service records.
5. Then start typing below the name columns in the list in order to filter the list based on your criteria.
1. To delete a self-service record, you have to be first on your Admin account.
2. Press on the Integration tab ( ) from the left side of the page.
3. Then press on the Self-service tab ( ) from below.
4. Then press on the List button on the right side of the menu in order to see all self-service records.
5. Then press on the Delete button (  ) on the right of the wanted self-service record.
6. Once pressed, the self-service record will be deleted, so think twice before taking this kind of action.
1. To edit a self-service record, you have to be first on your admin account.
2. Press on the Integration tab ( ) from the left side of the page.
3. Then press on the Self-service tab ( ) from below.
4. Then press on the List button on the right side of the menu in order to see all self-service records.
5. Then press on the Edit button (  ) on the right of the wanted self-service record.
6. Here you can modify the wanted fields. After modifying the fields, press on the Update button in order for the changes to take effect.

1. To view a self-service record, you have to be first on your admin account.
2. Press on the Integration tab ( ) from the left side of the page.
3. Then press on the Self-service tab ( ) from below in order to view details from a self-service record.
4. Then press on the List button on the right side of the menu in order to see all self-service records.
5. Then press on the View button (  ) on the right of the wanted self-service record.
6. From here, you can either go back to the list by pressing the Back button or go to the edit section by pressing the Edit button.


1. To add a new self-service record, you have to be first on your admin account.
2. Press on the Integration tab ( ) from the left side of the page.
3. Then press on the Self-service tab ( ) from below in order to add a new self-service record.
4. Then press on the Add button on the right side of the menu in order to add a new self-service record.
5. Here you will have to fill in the required fields in order to add a self-service record.
6. After filling in the fields, you can either press on the:
- Back button – this will return you to the list of self-service records.
- Save & exit button – this will create a record based on the completed form and return you to the list of self-service records.
- Save & new button – this will create a record based on the completed form and show a new form to create a new self-service record.

1. To enable SMS messages, you have to be first on your admin account.
2. Press on the Integration tab ( ) from the left side of the page.
3. Then press on the SMS tab from below in order to see all types of SMS messages available.
4. From here, you can enable/disable different types of SMS messages that can be triggered only under certain conditions. You can also change or customize the default message template from each type of SMS message by typing each word and [shortcode] or by using the predefined buttons with their respective [shortcodes]. The SMS messages and their effects when enabled are:
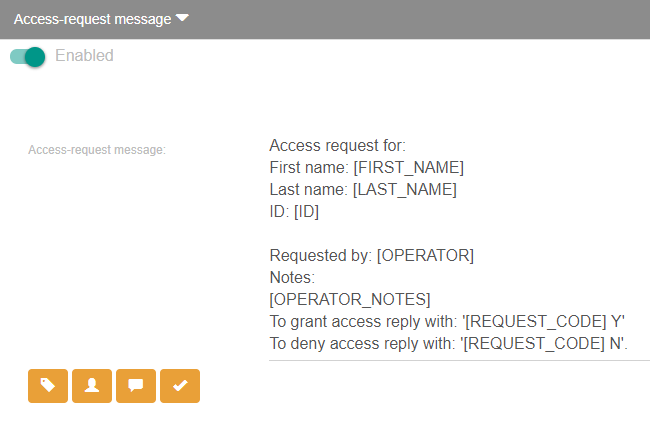
- Accept-request message – this message triggers when a resident has the option SMS access validation enabled. After that, a resident user can accept or deny a request from an incoming person or auto record by sending an SMS message back with the allow/deny code attached with the SMS request received instead of going in the app interface to allow or deny the request.
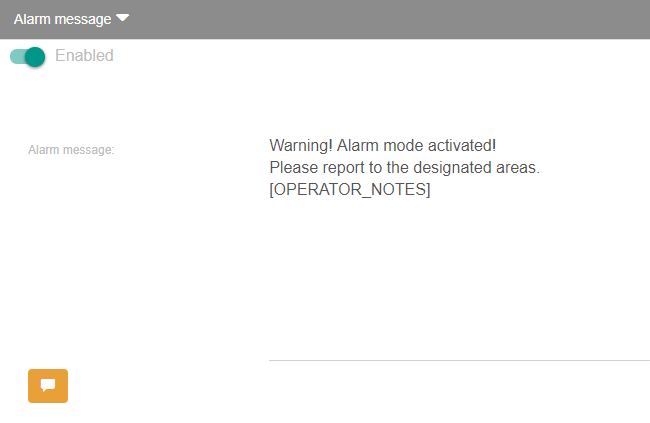
- Alarm message – this message triggers when an operator activates the alarm mode. Multiple messages with the template used will be sent to all guests from the same location that the operator belongs to.
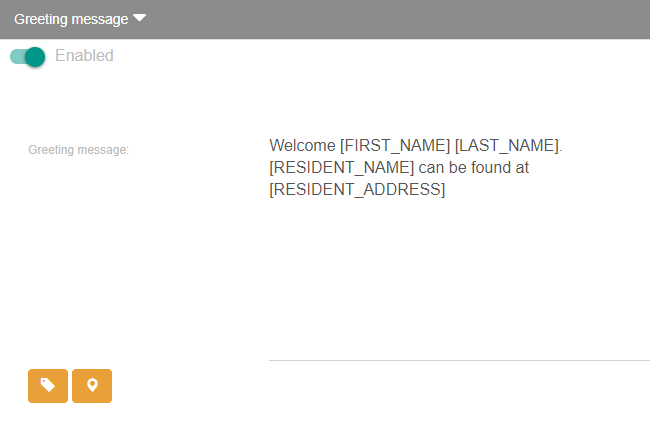
- Greeting message – this message triggers if a phone number is attached to a person or an auto record and they also have been checked-in by an operator. After that, the person with the respective phone number will be notified through an SMS message with details about where to find the visited resident.
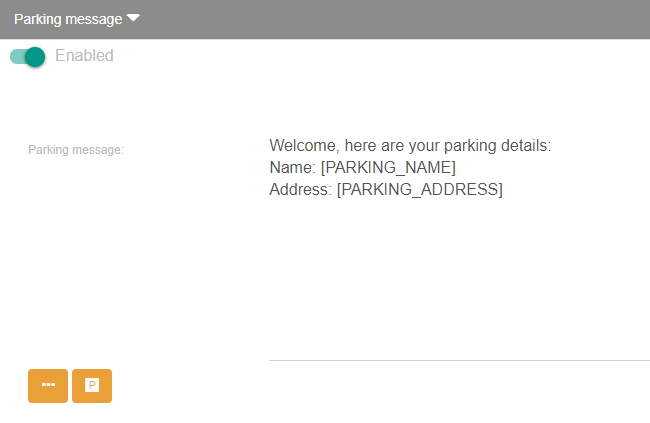
- Parking message – this message triggers only if an operator enters a phone number for a new person or auto record. After that, the person with the respective phone number will be notified through an SMS message with details about their parking spot.
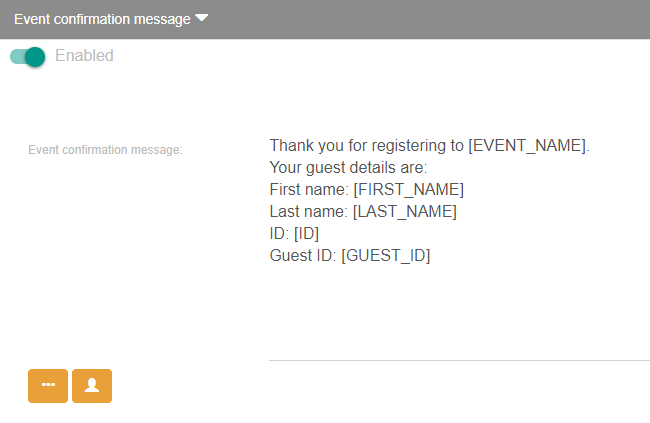
- Event confirmation message – this message triggers when a new registration is made through a registration form from an active event. The person with the respective phone number from the registration will be notified through an SMS message with guest details.
5. After setting up the SMS messages, press on the Save button in order for the changes to take effect.

1. To sort the meeting rooms, you have to be first on your admin account.
2. Press on the Meeting room tab from the left side of the page.
3. Then press on the List tab from below in order to see all meeting rooms.
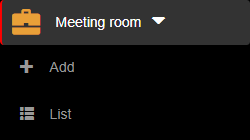
4. Then press on the upper/lower arrow on the right of any of the name columns in order to sort the list.