1. To sort the auto records, you have to be first on your operator account.
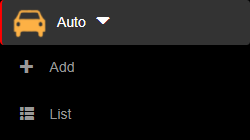
2. Press on the Auto tab (  ) from the left side of the page.
3. Then press on the List tab ( ) from below in order to see all auto records.
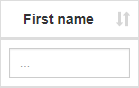
4. Then press on the upper/lower arrow on the right of any of the name columns in order to sort the list.
1. To search an auto record, you have to be first on your operator account.
2. Press on the Auto tab ( ) from the left side of the page.
3. Then press on the List tab ( ) from below in order to see all auto records.
4. Then start typing below the name columns in the list in order to filter the list based on your criteria.
1. To checkout an auto record, you have to be first on your operator account.
2. Press on the Auto tab ( ) from the left side of the page.
3. Then press on the List tab ( ) from below in order to see all auto records.
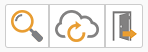
4. Then press on the Checkout button (  ) on the right of the wanted auto record.
5. Once pressed, you can update the information that was initially entered and then save by pressing on the Update button.


6. After updating the information, the checkout button will disappear, but the value will be able to be modified in the edit section.
1. To edit an auto record, you have to be first on your operator account.
2. Press on the Auto tab ( ) from the left side of the page.
3. Then press on the List tab ( ) from below in order to see all auto records.
4. Then press on the Edit button (  ) on the right of the wanted auto record.
5. Here you can modify the wanted fields. After modifying the fields, press on the Update button in order for the changes to take effect.

1. To view an auto record, you have to be first on your operator account.
2. Press on the Auto tab ( ) from the left side of the page.
3. Then press on the List tab ( ) from below in order to see all auto records.
4. Then press on the View button (  ) on the right of the wanted auto record.
5. Here you will see the information only from that selected auto record. From here, you can either go back to the list by pressing the Back button or go to the edit section by pressing the Edit button.


1. To add a special status to a person/vehicle, you have to be first on your operator account.
2. Press on the Auto tab ( ) from the left side of the page.
3. Then press on the List tab ( ) from below in order to see all auto records.
4. Then press on the VIP button (  – off,
  – on ), Greylist button (
  – off,
  -on ) or Blacklist button (
  – off,
  – on) on the right of the wanted auto record. A person/vehicle can be either VIP/Greylist or VIP/Blacklist, but cannot be Blacklist/Greylist.

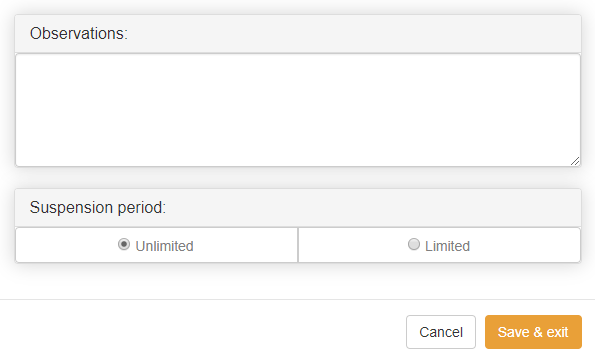
4.1. Pressing the Blacklist button ( ) will also bring out a pop-up in which you will be able to write your own Observations, set the Suspension period: Unlimited or Limited, which show days based on the numbers that where added by the admin in the advanced section of settings and in order to save everything you must press the Save & exit button.
5. The person/vehicle with a special status will be displayed in the tabs corresponding to each special status. The tabs can be accessed by pressing on the VIP, Greylist or Blacklist tabs from the left side of the page.
6. There you will see a list with all the people/vehicles who have a special status. Those people/vehicles can be stripped from their status by clicking on the Remove button (  ) on the right of the selected person/vehicle. The same thing can be done in the main auto records list by clicking again on their selected status.
1. To import auto records, you have to be first on your operator account.
2. Press on the Auto tab ( ) from the left side of the page.
3. Then press on the List tab ( ) from below in order to see all auto records.
4. Then press on either Import data button, if you have already filled an empty form with auto records or Download form button in order to fill it with auto records and then importing it with the import feature. Both buttons are located on the left side of the page above the name columns.

1. To add a new auto record, you have to be first on your operator account.
2. Press on the Auto tab ( ) from the left side of the page.
3. Then press on the Add tab ( ) from below in order to add a new auto record.
4. Here you will have to fill in the required fields in order to add an auto record.
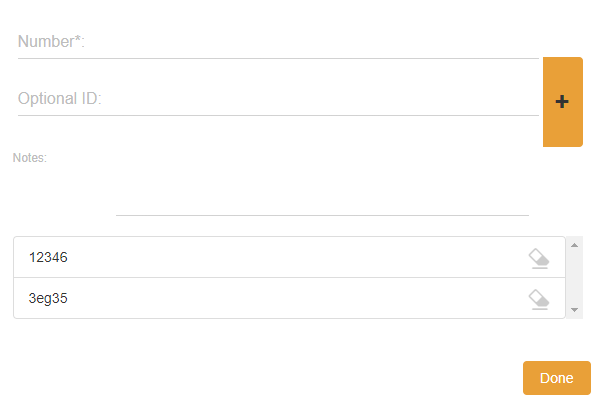
4.1. With invoices, notices or seals you can add an id document with the Add button once the field has been filled or erase the id with the Remove button on the right of the wanted id. All changes are saved once the Done button is pressed.

5. After filling/selecting the fields, you can either press on the:
- Back button – this will return you to the list of auto records.
- Save & exit button – this will create a record based on the completed form and return you to the list of auto records.
- Save & new button – this will create a record based on the completed form and show a new form to create a new auto record.

6. After saving the new auto record, a notification will appear with the message “Requires permission.” and in order to save the new auto record in the list, a resident type operator, that belongs to the resident that the newly created auto record visited, must allow access and then you will have to go to the Guests tab from left side of the page and then press on the Check-in button (  ) on the right of the wanted guest that was put on hold.
Provide safety to AUTO
Auto are vehicles with people in it that can be checked in by an operator.
- Attach a type of id number identification as well as registration plates
- Download a form for completion and then to be imported
- Can be checked out either after an amount of type or by an operator
