1. To sort the cameras, you have to be first on your admin account.
2. Press on the Integration tab ( ) from the left side of the page.
3. Then press on the Cameras tab ( ) from below.
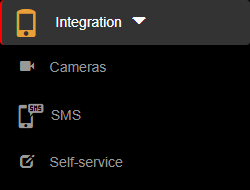
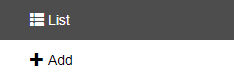
4. Then press on the List button on the right side of the menu in order to see all cameras.
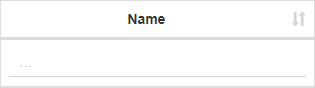
5. Then press on the upper/lower arrow on the right of any of the name columns in order to sort the list.
1. To search a camera, you have to be first on your admin account.
2. Press on the Integration tab ( ) from the left side of the page.
3. Then press on the Cameras tab ( ) from below.
4. Then press on the List button on the right side of the menu in order to see all cameras.
5. Then start typing below the name columns in the list in order to filter the list based on your criteria.
1. To delete a camera, you have to be first on your Admin account.
2. Press on the Integration tab ( ) from the left side of the page.
3. Then press on the Cameras tab ( ) from below.
4. Then press on the List button on the right side of the menu in order to see all cameras.
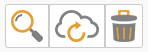
5. Then press on the Delete button (  ) on the right of the wanted camera.
6. Once pressed, the camera will be deleted, so think twice before taking this kind of action.
1. To edit a camera, you have to be first on your admin account.
2. Press on the Integration tab ( ) from the left side of the page.
3. Then press on the Cameras tab ( ) from below.
4. Then press on the List button on the right side of the menu in order to see all cameras.
5. Then press on the Edit button (  ) on the right of the wanted camera.
6. Here you can modify the wanted fields. After modifying the fields, press on the Update button in order for the changes to take effect.

1. To view a camera, you have to be first on your admin account.
2. Press on the Integration tab ( ) from the left side of the page.
3. Then press on the Cameras tab ( ) from below in order to view details from a camera.
4. Then press on the List button on the right side of the menu in order to see all cameras.
5. Then press on the View button (  ) on the right of the wanted camera.
6. Here you will see the information only from that selected camera and you can also press on the Camera button ( ) in the Test camera field from below in order to see the most recent information the camera has received.

7. Here you will see a popup window with the most recent information the camera has received. From here, you can either go back to the list by pressing the Back button or go to the edit section by pressing the Edit button.


1. To add a new camera, you have to be first on your admin account.
2. Press on the Integration tab ( ) from the left side of the page.
3. Then press on the Cameras tab ( ) from below in order to add a new camera.
4. Then press on the Add button on the right side of the menu in order to add a new camera.
5. Here you will have to fill in the required fields in order to add a camera.
6. After filling in the fields, you can either press on the:
- Back button – this will return you to the list of cameras.
- Save & exit button – this will create a record based on the completed form and return you to the list of cameras.
- Save & new button – this will create a record based on the completed form and show a new form to create a new camera.

