1. To use the export feature, you have to be first on your inspector account.
2. Press on the Auto tab (  ) from the left side of the page.

3. Then press on the Page export button or Full export button from the left side of the page above the name columns.

3.1. Page export means exporting only the current visible list in the page.
3.2. Full export means exporting all the data from the location that the inspector is assigned to.
Supervise existing AUTO
Auto is a list of vehicles that are checked in/out by an operator.
- Inspect vehicles that visit
- Export auto data
1. To sort the people, you have to be first on your inspector account.
2. Press on the Persons tab ( ) from the left side of the page.

3. Then press on the upper/lower arrow on the right of any of the name columns in order to sort the list.

1. To search a person, you have to be first on your inspector account.
2. Press on the Persons tab ( ) from the left side of the page.

3. Then start typing below the name columns in the list in order to filter the list based on your criteria.

1. To view a person, you have to be first on your inspector account.
2. Press on the Persons tab ( ) from the left side of the page.

3. Then press on the View button (  ) on the right of the wanted person.

4. Here you will see the information only from that selected person. From here, you can go back to the list by pressing the Back button.

1. To change the timezone of a person, you have to be first on your inspector account.
2. Press on the Persons tab ( ) from the left side of the page.

3. Then press on the Local timezone/My timezone slider on the left side of the page above the name columns in order to see the time when the person was created based on the zone selected. The Local timezone can be changed from the Admin Profile Settings by the admin account and My timezone can be changed from the Inspector Profile Settings.

1. To use the export feature, you have to be first on your inspector account.
2. Press on the Persons tab ( ) from the left side of the page.

3. Then press on the Page export button or Full export button from the left side of the page above the name columns.

3.1. Page export means exporting only the current visible list in the page.
3.2. Full export means exporting all the data from the location that the inspector is assigned to.
Keep watch on PERSONS
Persons is a list of people that can be checked in/out by an operator.
- Inspect people that visit
- Export people data
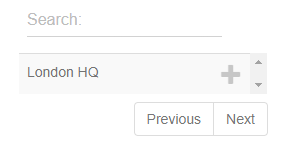
1. To search a location, you have to be first on your inspector account.
2. Press on the Home tab ( ) from the left side of the page.

3. Then start typing in the search box located on the left side of the graph in order to filter the list based on your criteria.

1. To add a location to the graph, you have to be first on your inspector account.
2. Press on the Home tab ( ) from the left side of the page.

3. Here you will see a graph and in order to fill the graph with data, you will have to press on the Plus button ( ) on the right of the location displayed on the left list of the graph or Remove button ( ) if you want remove a location from the graph. The locations must be created by the admin account in order to see them.

4. You can also see the number of Locations the inspector has and also a shortcut to Notifications on the right side of the page.
![]() ) from the left side of the page.
) from the left side of the page.![]()
![]()


