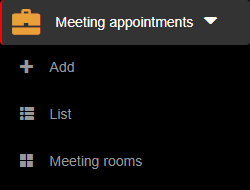
1. To add a new meeting appointment, you have to be first on your resident account.
2. Press on the Meeting appointments tab from the left side of the page.
3. Then press on the Add tab from below in order to add a new meeting appointment.

4. Here you will have to fill the required fields in order to add a meeting appointment.
5. After filling/selecting the fields, you can either press on the:
- Back button – this will return you to the list of meeting appointments.
- Save & exit button – this will create a record based on the completed form and return you to the list of meeting appointments.
- Save & new button – this will create a record based on the completed form and show a new form to create a new meeting appointment.


Gather up for MEETING APPOINTMENTS
Meeting Appointments are created in order to schedule different types of meetups.
- Manage multiple meeting appointments
- Keep track of all appointments in each meeting room
1. To sort the parking areas, you have to be first on your resident account.
2. Press on the Parking areas tab from the left side of the page.

3. Then press on the upper/lower arrow on the right of any of the name columns in order to sort the list.

1. To search a parking area, you have to be first on your resident account.
2. Press on the Parking areas tab from the left side of the page.

3. Then start typing below the name columns in the list in order to filter the list based on your criteria.

1. To view a parking spot, you have to be first on your resident account.
2. Press on the Parking areas tab from the left side of the page.

Check reservations for PARKING AREAS
Parking Areas are used to hold multiple vehicles on a location for a period of time.
- Observe multiple parking spots with ease
- Track vehicles by seeing their designated parking spots
1. To sort the auto records, you have to be first on your resident account.
2. Press on the Auto tab (  ) from the left side of the page.

3. Then press on the upper/lower arrow on the right of any of the name columns in order to sort the list.

1. To search an auto record, you have to be first on your resident account.
2. Press on the Auto tab (  ) from the left side of the page.

3. Then start typing below the name columns in the list in order to filter the list based on your criteria.

1. To view an auto record, you have to be first on your resident account.
2. Press on the Auto tab (  ) from the left side of the page.

3. Then press on the View button (  ) on the right of the wanted auto record.

4. Here you will see the information only from that selected fleet record. From here, you can go back to the list by pressing the Back button.
Supervise existing AUTO
Auto is a list of vehicles that are checked in/out by an operator.
- Examine vehicles that visit


